TL1000R
Joe V's Airbox and Base Plate Modifications
This mod definately works but is not a patch on taking the entire lid off. This page is Joe's original mod with extra pics taken from another site.
AIRBOX
1.
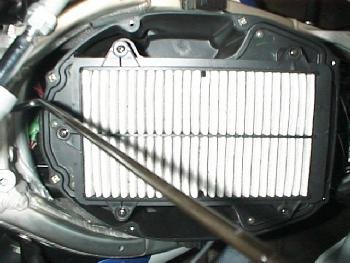
Remove the air box lid
2. Turn the lid upside down
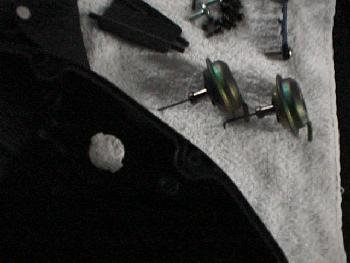
3. You will see the 2 air intake valves. These will be removed.
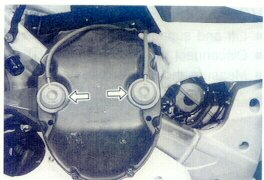
4. Slide the actuator rods out of the flappers (indicated in lid-1 jpeg)
5. Turn the lid over and locate the intake air control valve actuators
(indicated in lid-2 jpeg)
6. Turn the actuators and remove from the air box lid .
7. Take one of the vacuum lines that run to the actuators and form a loop
to the
"t" fitting in the vacuum line.
8. Now all that is left to do to the lid is to seal the holes left by
the vacuum
actuators. On the bike that I have done, I use fiberglass disks, washers
really,
with gasket maker, and place one disk on the inside of the opening and
one disk
on the outside of the opening and secure with a 1/4" bolt and self-locking
nut.
It is important to seal these openings.
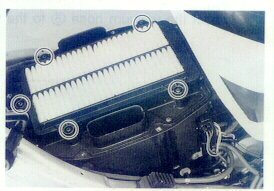
1.
Remove the air filter (illustrated in figure 1)
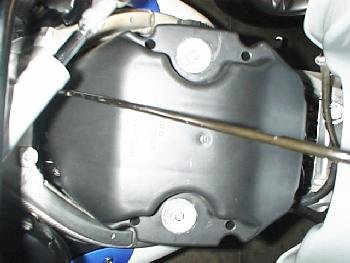
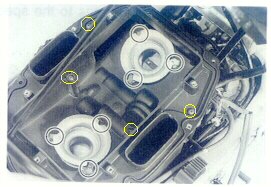
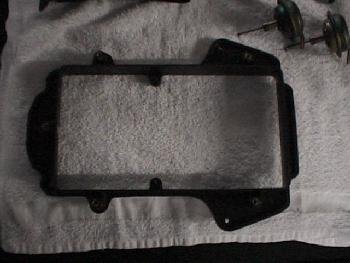
2. Remove the base plate by removing the screws (indicated in figure-2)
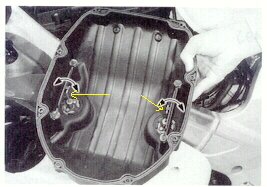
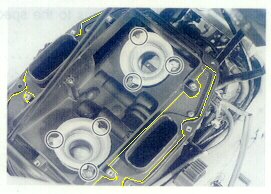
3. Cut away the material outlines in yellow in figures 3 and 4. Be careful
not
to cut the towers that the filter bolts to. Also if you turn the base
plate up
side down you will see that there is a lip that seals to the bottom of
the base
plate, be careful not to cut this.
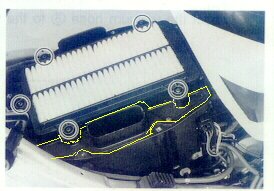
4. Reinstall the base plate and filter. Reinstall the air box lid. Check
the TPS
adjustment. Re-map to +5 +10 +5 and you are done. You should now be able
to
reach red line in 6th gear.
_____________________________________________________________________
With extra pics
The first step is to remove the airbox lid and take off the flappers and valve actuators.
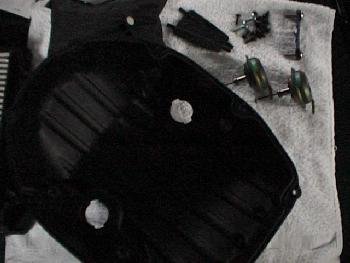
The next phase is to plug the actuator holes. I sandwiched the hole in the lid with two washers, a bolt and locking nut. Also, using some sealant to ensure it's airtight.
 The pictures below show the airbox without the baseplate. As you can see the holes where
the ram air enters are evident. I modified the baseplate to open these
holes up. Joe's instructions are modifying the baseplate even more and
removing the "wings" remaining on the plate, with the exception
of the screw holes. I don't know there is an obvious benefit to doing
this as the ram air will not enter through there anyway. If you study
the picture, you'll see what I mean.
The pictures below show the airbox without the baseplate. As you can see the holes where
the ram air enters are evident. I modified the baseplate to open these
holes up. Joe's instructions are modifying the baseplate even more and
removing the "wings" remaining on the plate, with the exception
of the screw holes. I don't know there is an obvious benefit to doing
this as the ram air will not enter through there anyway. If you study
the picture, you'll see what I mean.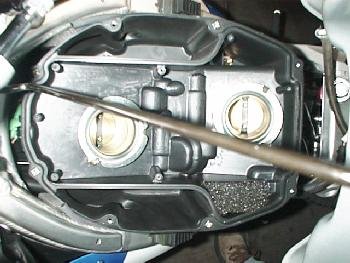
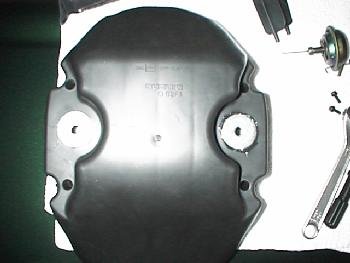
 The next set of pictures show the airbox with the modified baseplate and filter installed.
It also shows you the lid installed again. Of course the remaining step
was to loop the hose at the T piece.
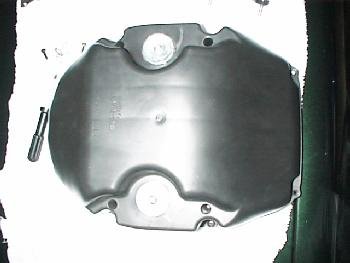
The next set of pictures show the airbox with the modified baseplate and filter installed.
It also shows you the lid installed again. Of course the remaining step
was to loop the hose at the T piece.